Microsoft PowerPoint is a robust instrument that all of us like to make use of. There is no such thing as a different program that’s as full when it comes right down to delivering shows. Now, a few of us would love to have the ability to create a progress bar for shows. The query is, proper now, is it attainable?
How you can create and use Progress Bar in PowerPoint
The reply to that query is a convincing sure. Anybody with the proper info can simply create a progress bar, and guess what? We’re going to element how one can get it carried out.
Now, it’s attainable to manually set up a progress bar by putting in the related form beneath every slide. Nonetheless, that brings further issues to the desk. You see, customers should measure the size of each form that’s primarily based on the variety of slides within the presentation doc.
Additionally, each time a slide is eliminated, you’ll then be required to recreate the progress bar for all different slides. We will’t be bothered with doing issues like that; subsequently, we’ve determined to go the Macro route. Right here’s how!
- Open your most well-liked PowerPoint presentation
- Choose Macros and inject a reputation
- Paste code in Microsoft Visible Primary for Purposes (VBA) window
- Shut and run Macro
Allow us to take a look at this extra from an in depth perspective.
1] Open your most well-liked PowerPoint presentation
OK, so the very first thing you could do right here is to open the PowerPoint presentation you need to work with. If not, you possibly can create one from scratch after which work your approach up.
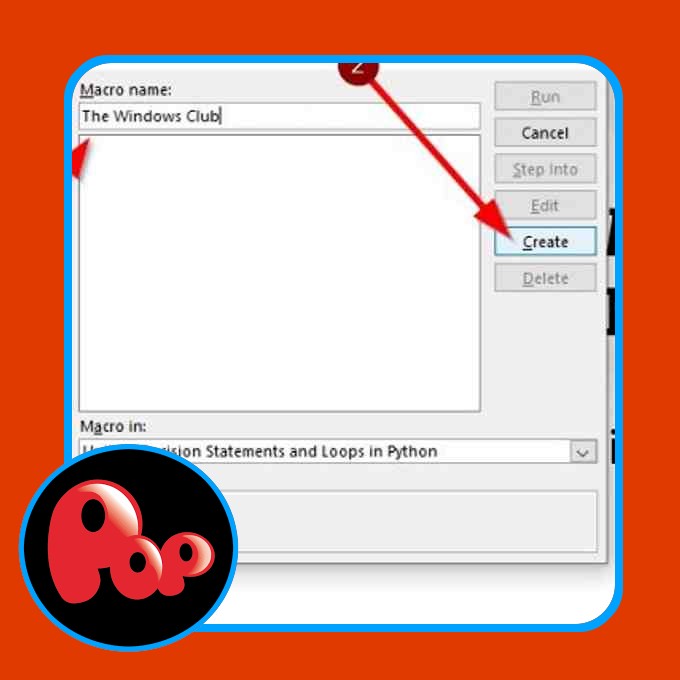
2] Choose Macros and inject a reputation
When you’ve opened your presentation doc, you could now go on forward and click on on View, and from there, make sure you choose Macros positioned on the proper. A small window ought to seem instantly after you’ve clicked on the button.
The following step, then, is to sort a Macro Identify. We’ve chosen so as to add SlideBar, however you might be free to incorporate no matter identify that’s greatest suited. As soon as that’s carried out, hit the create button to finish this part.
3] Paste code in Microsoft Visible Primary for Purposes (VBA) window
OK, so after hitting the Create button, a brand new window will seem. This window is named Microsoft Visible Primary for Purposes (VBA), and it’s the place the magic occurs.
From throughout the editor, you need to see the next:
Sub ProgressBar()

Finish Sub
Click on between the 2 traces of the code, and make sure you copy and paste the next instantly:
On Error Resume Subsequent
With ActivePresentation
For X = 1 To .Slides.Depend
.Slides(X).Shapes("PB").Delete
Set s = .Slides(X).Shapes.AddShape(msoShapeRectangle, _
0, .PageSetup.SlideHeight - 12, _
X * .PageSetup.SlideWidth / .Slides.Depend, 12)
s.Fill.ForeColor.RGB = RGB(127, 0, 0)
s.Identify = "PB"
Subsequent X:
Finish With
4] Shut and run Macro
After you’ve accomplished the above activity, you could now shut the VBA window instantly.
As soon as that’s carried out, click on on the View tab from inside PowerPoint, then choose Macros.
Select the identify of the Macro, and end off by deciding on Run, and that’s it.
Now learn: How you can create a Funnel Chart in Excel, PowerPoint and Phrase.